Getting Started with ADO .NET
Using the ADO .NET API requires a little bit of set up before you can get your application to compile and run correctly. If you follow the steps below, you will be able to execute your application correctly in both the command line and Visual Studio GUI interfaces. There are also directions on using the DbProviderFactory class.
Registering the Raima.Rdm.dll
- Open a command prompt with Administrator permissions and navigate to the installation directory for the Raima product
-
Run
gacutil /i Raima.Rdm.dll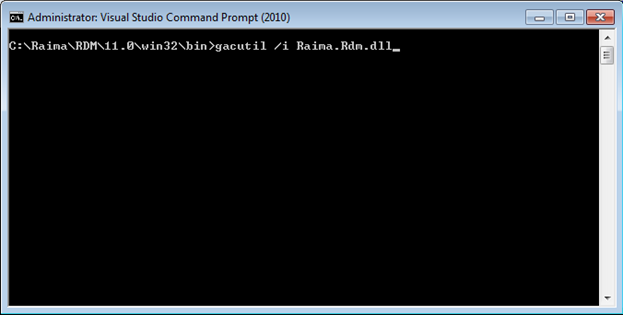
Command Line
- Find the version of the .NET framework you have installed:
Run
csc.exefrom the command line and it should output something like:Microsoft (R) Visual C# 2010 Compiler version 4.0.30319.1
- Create your ADO .NET application. Look at Basic ADO .NET Application Steps for more information on this topic.
-
Find the location you installed the RDM product into. The ADO .NET dll provided should be at the
install directory\Win32orWin64\Raima.Rdm.dll
- Compile your main class
.csfile you have created above by usingcsc.exe"entry point.csfile"
(i.e.,csc.exe /r:"Install dll folder" HelloWorld_ADO_main.cs)
Visual Studio GUI
- Step 1: Create a new C# project by going to File->New->Project… This will go through a setup window for your new project.
- Select a C# project of any type and select Ok.
- On the right hand side, there will be a References folder. You will need to add a reference to Raima.Rdm.dll there. Do this by right clicking the References folder and selecting Add Reference…
-
Click the Browse tab and navigate to your installation directory then select Raima.Rdm.dll
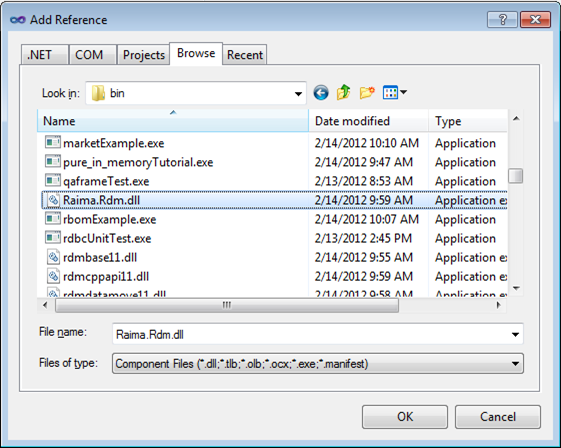
- Click Ok and you are now ready to use the Raima ADO .NET provider in your project.
Using DbProviderFactory
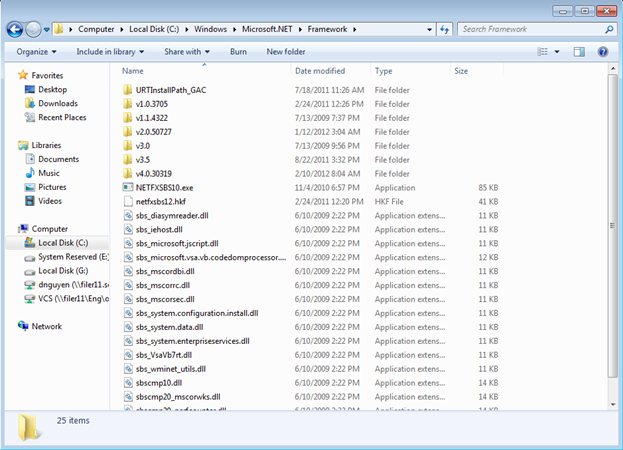
- If you wish to use the
DbProviderFactoryobject to get access to the Raima ADO .NET provider then you will first need to find out the version of the .NET framework you are using by following the steps in step 1 of the command line section. -
Navigate to that folder in your Windows directory.
-
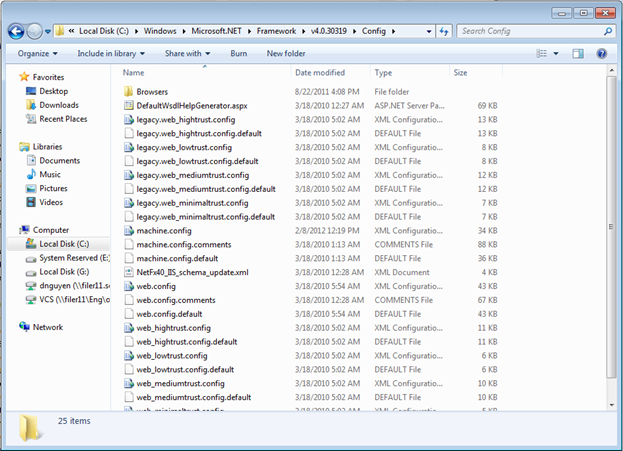
Go into the folder for the version you are using and then into the Config folder there.
-
Open the machine.config file. On Windows 7, you will need to do so with notepad and Administrator access.
-
Find the
<DbProviderFactories>section and add the following entry:<add name="Raima RDM Embedded Data Provider" invariant="Raima.Rdm" description=".NET Framework Data Provider for RDM" type="Raima.Rdm.RdmProviderFactory, Raima.Rdm, Version=11.0.1000.0, Culture=neutral, PublicKeyToken=23f692695ad03bb6"/>
