Configuring DBeaver for Remote Access to an RDM Database
This section outlines the steps to take in order to access an RDM 14.2 database from DBeaver using the client/server model.
DBeaver Community Edition 7.3.4 is used for this section. Details may differ depending on the edition and version of DBeaver.
Create an RDM Driver
- Start DBeaver
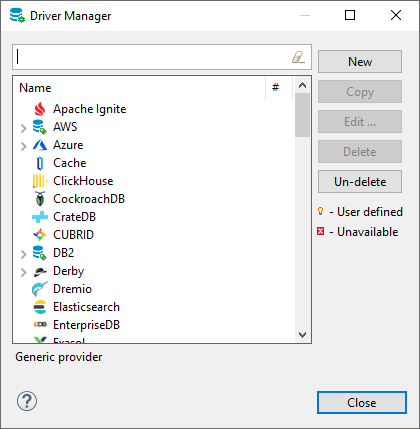
- From the main window, Choose Database -> Driver Manager
- On the Driver Manager dialog box, choose New
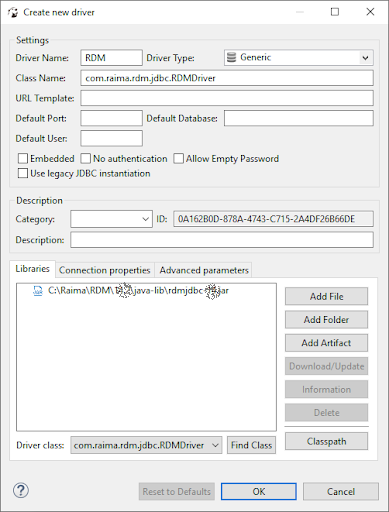
- Name the driver "RDM" (or whatever you like) in the Driver Name edit box
- Click Add File
- Choose the Raima JDBC driver (
rdmjdbc-15.jar) you wish to use with DBeaver. The driver is located in thejava-libdirectory of the RDM installation (e.g.C:\Raima\RDM\15.2\java-lib). - Click Find Class.
- Choose "
com.raima.rdm.jdbc.RDMDriver" as it is displayed for the Driver class. - Click "OK"
- Click Close to close the Driver Manager dialog box.
Creating a Connection
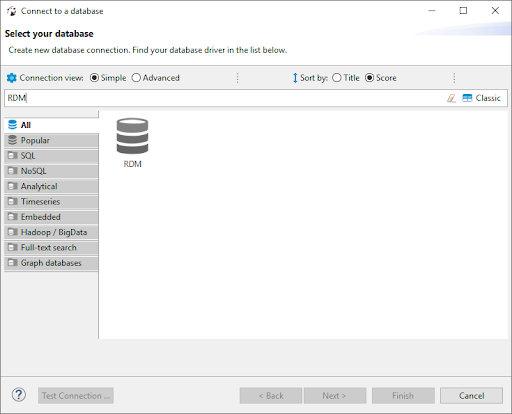
- From the main window, choose Database -> New Connection
- In the Connect to a database dialog box, type "RDM" into the search box so your newly-created entry is displayed
- Click "RDM"
- Click Next
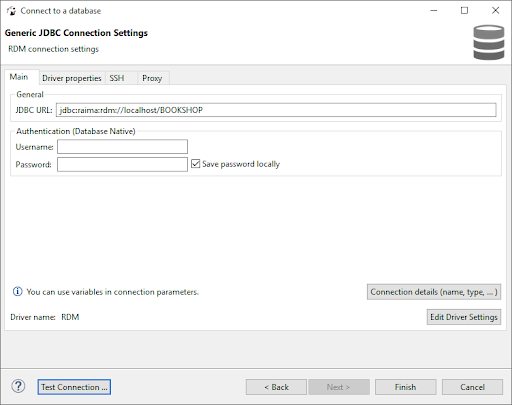
- In the next screen, Generic JDBC Connection Settings, enter the JDBC URL in the JDBC URL field as jdbc:raima:rdm://<hostname>/<database_name>, where
<hostname>is the hostname of the computerrdm-tfsis running, and<database_name>is the name of the database to open; for example:
jdbc:raima:rdm://localhost/BOOKSHOP
Make sure rdm-tfs is running first!
- Make sure you have
rdm-tfsrunning. To open the BOOKSHOP database used as an example above, the DOCUMENT ROOT ofrdm-tfsmust point to the following directory:
C:\Raima\RDM\15.2\\GettingStarted\sql\sql_bookshop
- Click Test Connection to ensure that the connection is successful.
- Click Finish
Connecting to the Database
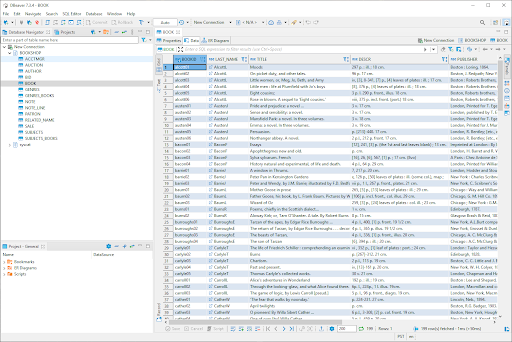
From the main window, choose the newly created connection from the Database Navigation tab
Collapse your database (e.g. "bookshop") to view the data and metadata