Running HelloWorld App in vxWorks-7 Simulator
Windows Host / Downloadable Kernel Modules
Introduction
This tutorial will give you a quick view of the steps needed to get an RDM application running in the Wind River vxWorks-7 simulator. The concepts addressed here are:
- Defining a docroot using the
rdm_rdmAllocTFS()command. In order to place the database in a known position on the target device, we will provide the docroot location in the call to allocate the embedded TFS. See line 94 in the HelloWorld.c source file.
Building the vxWorks Kernel Image
Wind River vxWorks-7 comes with a prebuilt Source Build (vsb_vxsim_windows) and a prebuilt kernel image. However, to run the RDM examples, we will need to build a different vxWorks kernel image with the additional components defined. The additional components we are defining for our simulator are:
        -c INCLUDE_HRFS \
        -c INCLUDE_HRFS_FORMAT \
        -c INCLUDE_RAM_DISK \
        -c INCLUDE_RAM_DISK_FORMAT_HRFS \
        -c INCLUDE_DEBUG_AGENT_START \
        -c INCLUDE_POSIX_PTHREAD_SCHEDULER \
        -p NUM_FILES=255 \
        -p HRFS_DEFAULT_MAX_FILES=255 \
        -p RTP_FD_NUM_MAX=255 \
        -p RAM_DISK_SIZE=0x8000000
Steps
- Change to the WindRiver install directory and execute the wrenv command to start a WindRiver command environment:
- Change to the
target/vxworks7-x86_64_simwindowsdirectory in the RDM install directory and execute the following command:
C:\WindRiver> wrenv -p vxworks-7
C:\Raima\RDM\15.1\target\vxworks7-x86_64_simwindows> sh setup.sh --vsb --vip
This command will create a new source build and kernel image we will use in the following steps.
Creating a HelloWorld Project
The following steps will create a HelloWorld downloadable kernel module project that will run on the vxWorks simulator.
Steps
- Copy the HelloWorld.sdl schema file to the
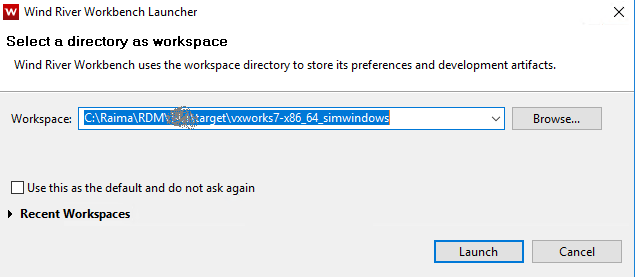
target/vxworks7-x86_64_simwindowsdirectory: - Start the WorkBench environment and set the workspace to the
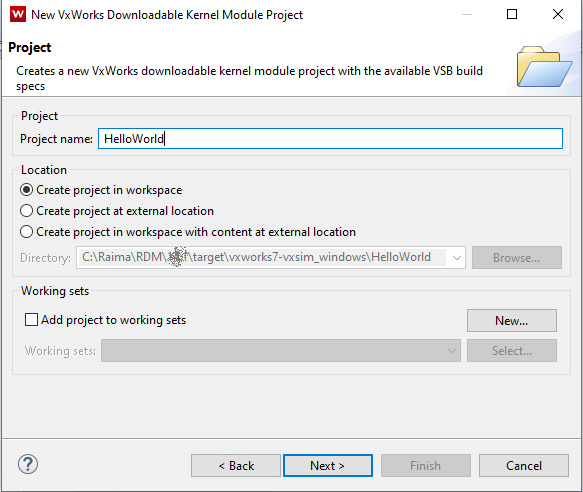
target/vxworks7-x86_64_simwindowsdirectory in the RDM install directory: - Create a Downloadable Kernel Module Project named HelloWorld in the current workspace:
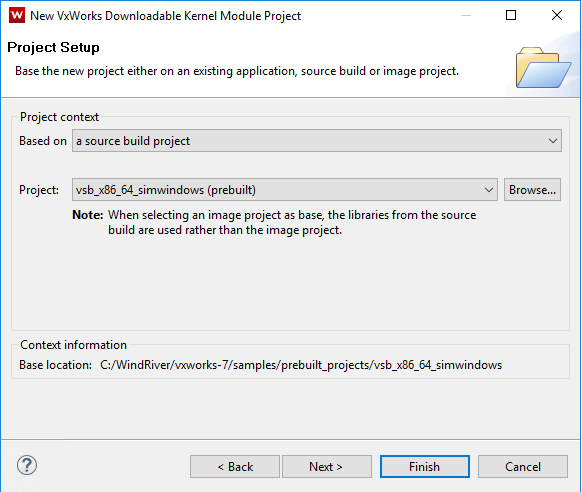
- Set the project context to the vsb_vxsim_windows project:
- Copy the HelloWorld.c source file to the
target/vxworks7-x86_64_simwindows/HelloWorlddirectory in the RDM install directory. - In a command prompt, change into the
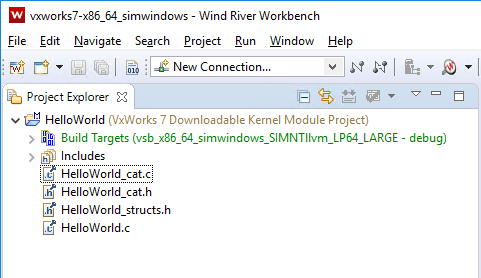
target/vxworks7-x86_64_simwindows/HelloWorlddirectory and run the following command: - In the WorkBench environment, delete the
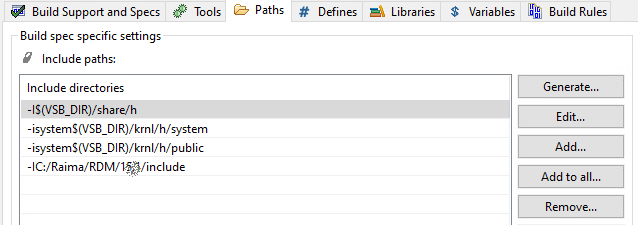
dkm.cfile from the newly created project and refresh the screen. The list of files in the project should look like this: - In the Build Properties for HelloWorld, add the RDM include path to the Paths tab:
- In the Build Properties for HelloWorld, add the RDM library path and required libraries to the Libraries tab:
- Build the HelloWorld project
C:\Raima\RDM\15.1\target\vxworks7-x86_64_simwindows\HelloWorld> rdm-compile --catalog --c-structs ..\HelloWorld.sdl
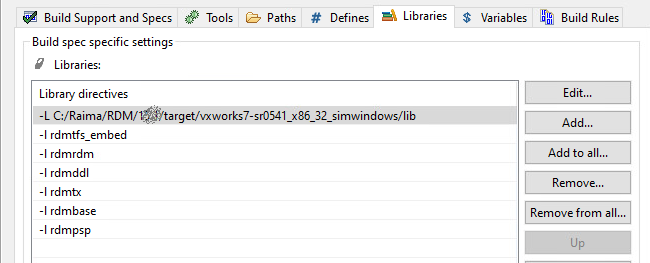
The library order is important! The dependent libraries and helper libraries must always follow after an included library in the list above. For example, rdmbase is dependent on rdmpsp. For a list of libraries and their dependencies, see RDM Libraries.

Running the HelloWorld App in the Simulator
Steps
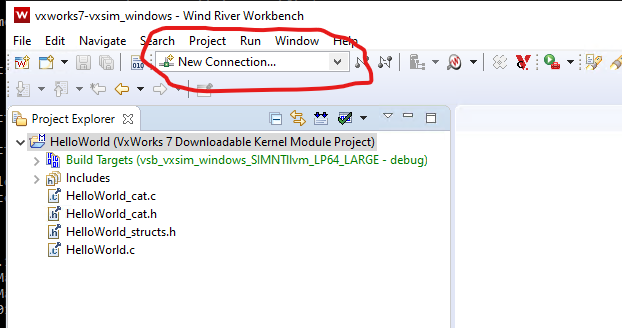
- Select New Connection:
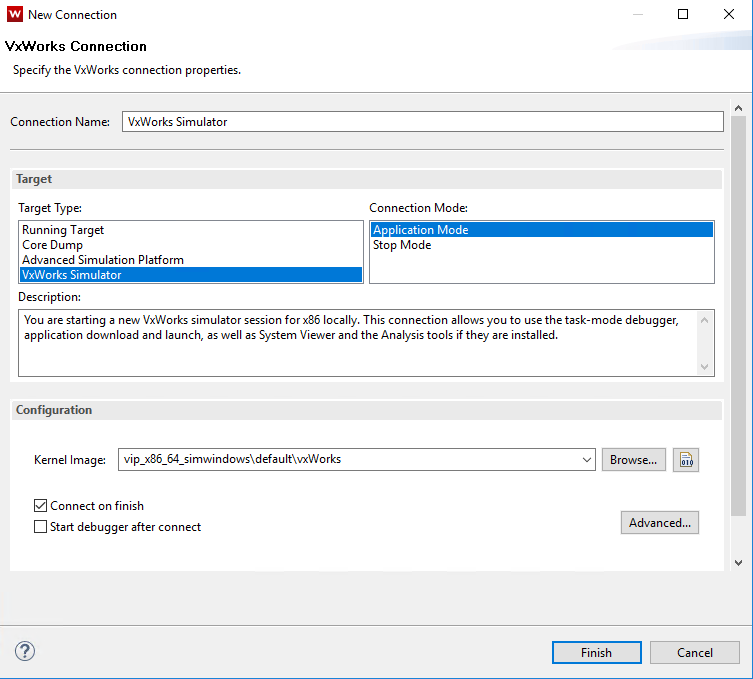
- In the New Connection dialog, select VxWorks Simulator and browse to the Kernel Image we created previously in this workspace (
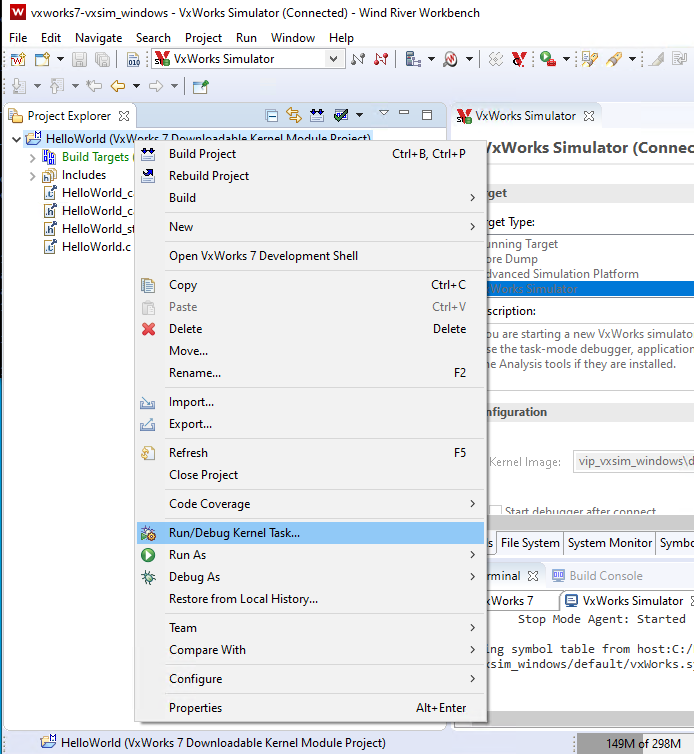
vip_x86_64_simwindows\default\vxWorks) and press Finish to connect to the simulator. - Right click on the HelloWorld project and select Run/Debug Kernel Task:
- Provide main_HelloWorld as the entry point for the Kernel Task. For this example
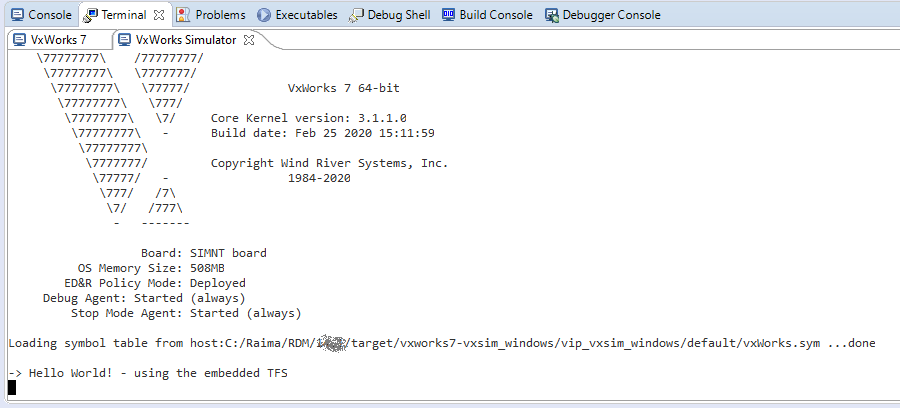
- Press OK and the HelloWorld DKM will be downloaded to the running VxWorks simulator and will execute. The result of this program execution and be seen on the VxWorks Simulator console.