RaimaDB ODBC Driver Registration
On Microsoft Windows, the RaimaDB ODBC Driver will be registered with Microsoft ODBC Driver Manager (ODBC DM). This allows any application built with the Microsoft ODBC libraries to access RaimaDB databases through ODBC DM.
The default installation is a 64-bit ODBC Driver Manager that will support a 64-bit Application using ODBC. If a 32-bit ODBC Driver Manager is required, please contact [email protected] for availability.
Installing the ODBC Driver Manager for RaimaDB
The ODBC Driver Manager option is ONLY available for the "Enterprise" edition of RaimaDB.
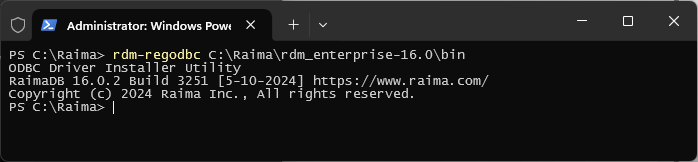
The installation of the RaimaDB driver manager is performed by a separate utility in the product installation. It is NOT part of the install process, nor is the uninstall part of the UNINSTALL procedure. The rdm-regodbc utility can be used to install and uninstall the driver manager. The registration will create one default Data Source Name (DSN) entry for the RaimaDB ODBC Driver. The user will be able to configure the default DSN entry or create one or more new DSN entries as necessary.
The following example, installs the DM and creates a "User DSN" named RaimaDB.
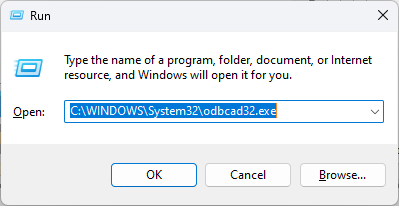
Opening the ODBC Driver Manager
To access the registered ODBC driver entries, take the following steps. The ODBC Data Source Administrator is used for the next steps.
A dialog box that looks like this should be displayed (Figure 1).
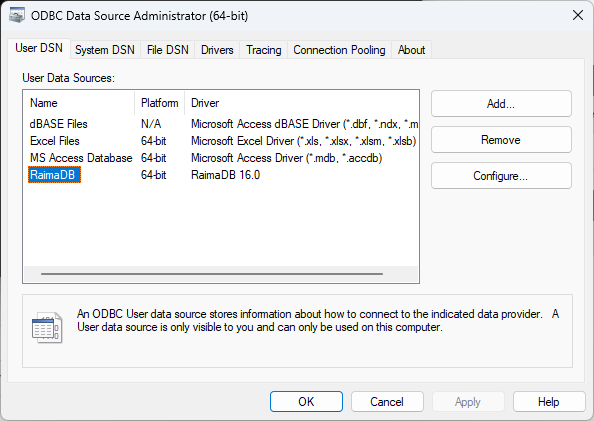
Figure 1: ODBC Data Source Administrator
Configuring the default DSN entry
To configure the default DSN entry for RaimaDB ODBC, highlight the entry named "RaimaDB" on one of the DSN tabs ("User DSN," "System DSN" or "File DSN") and click "Configure." Each tab its own default entry for RaimaDB. Changes made with the entry in one tab will not affect those in other tabs.
The "ODBC Raima Database Manager Setup" dialog box will be displayed (Figure 2).

Figure 2: ODBC RaimaDB Setup
| Data Source Name | Data Source Name is a unique identifier of the DSN entry. The default value is "RDM". To change the value, type in the desired text in the edit box and click "OK." |
| Description | Description is a text description of the DSN entry. To change the value, type in the desired text in the edit box and click "OK." |
| Databases | The RaimaDB ODBC Driver requires that one or more default databases be specified with ODBC DM. RaimaDB ODBC will open the specified databases once it successfully connects to the RaimaDB TFS. To add, modify or remove default databases, click "Databases." The "Database Configuration" dialog will be displayed (Figure 3). |
| Options | Click the "Options" button to configure the advanced options, such as the driver connection type. The "ODBC RaimaDB Setup" dialog will expand as shown in Figure 5. |
Working with Default Databases
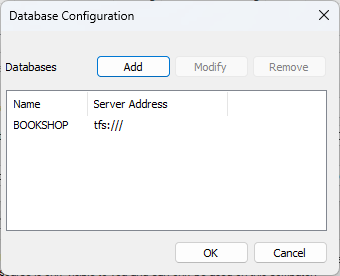
Figure 3: Database Configuration
To add a new database, click "Add." To modify an existing database, highlight the database to modify and click "Modify." To remove an existing database, highlight the database to remove and click "Remove."
Clicking "Add" or "Modify" will display the "New/Modify Database" dialog box. The "New Database" dialog box will be shown in Figure 4.
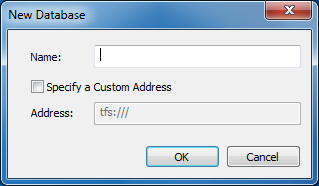
Figure 4: New Database
To add a new default database, type the desired name in the Name edit box. If you wish to place the new default database under the remote server running on a non-default location, check the "Specify a Custom Address" checkbox and enter the custom server address in the URI format in the Address edit box.
To modify an existing default database, modify the Name and Address entries as necessary. When finished, click "OK."
Database names are case-sensitive. It may not be noticeable on Windows, but is essential when mixing OS types (Linux hosted TFS being accessed by a Windows client).
Changing the Advanced Options
Click the "Options" button on the "ODBC Raima Database Manager Setup" dialog box (shown in Figure 2) in order to access the advanced configuration options. The dialog box will expand as shown below.
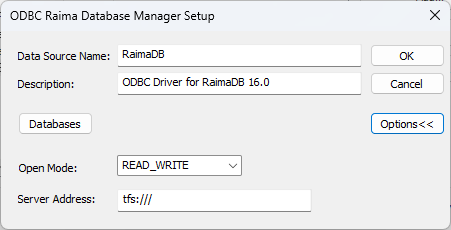
Figure 5: ODBC RaimaDB Setup with Advanced Options
| Server Address | Specify the address of the remote server in the URI format. The default value is tfs:/// which indicates the rdm-tfs running on the same machine. |
| Use Database Name As | This option enables or disables the schema name support in the RaimaDB ODBC Driver. Some third-party ODBC tools may require this option to be set one way or the other in order to access RaimaDB databases. The support is disabled by default. We recommend that this option not be changed unless the ODBC tool of your choice does not work correctly with RaimaDB ODBC with the default value. |
Using the ODBC Driver
In order to use the RaimaDB ODBC Driver, you must first start an instance of rdm-tfs in the location of the document root, or by passing in the docroot location with -d.
>cd database\
>rdm-tfs.exe
or
>rdm-tfs.exe -d c:\database\
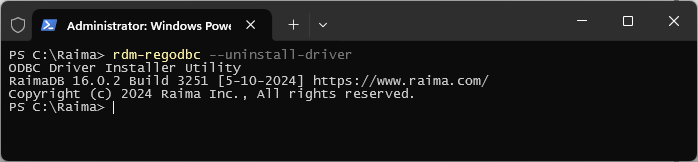
Uninstalling the RaimaDB ODBC Driver
Before uninstalling the driver, remove all the DSN entries referencing the RaimaDB driver to be uninstalled. After this is complete, the driver entry may be uninstalled by the rdm-regodbc utility: